Not that I cook only to make content (clearly – or we’d be going hungry, since I don’t post often) but it absolutely crossed my mind when I took our new oven on its maiden voyage that I’d most likely make a post out of it, and that it would be my second post about chocolate chip cookies and cookie accessories in like two months.
Mild hand wringing ensued, and then I remembered that I write this blog because I love to, not because I’m beholden to an audience. (Don’t get me wrong, dear readers: I appreciate all of you, but let’s be real, you’re here because you don’t mind an influx of cookie content, aren’t you?)
Anyway…yes, you read correctly: NEW. OVEN.

I haven’t completely broken it in yet, but it has so many modes: Sabbath mode! Convection! Proofing! Steam cleaning! Air fryer! (that last one is confusing because aren’t convection and air fryer the same thing? Who’s to say?) Rob ran it at 500 degrees for like 20 minutes just to see what would happen. The result: our kitchen only went up a couple degrees instead of the 10 or 15 it usually jumps while we’re baking at completely reasonable temperatures. The temperature? Reliable. The modes? EXPANSIVE.
I do love it, though it’s a bit smaller than the last one – my regular-sized baking sheets don’t fit in it, which I discovered the hard way while making these chocolate chip cookies from Preppy Kitchen. Fortunately, I have baking sheets in plenty of sizes, and if I need to make a casserole slightly too big for my oven, I’ll burn garbage in my backyard and bake it that way, because nothing matters.
What sets this chocolate chip cookie recipe apart?
These are the best chocolate chip cookies I’ve ever made, and I’m pretty sure there are two reasons why:
- I weighed the flour. This advice was noted in the original recipe from Preppy Kitchen and I can’t get over what a difference it must have made. In the past, almost every chocolate chip cookie I’ve ever made was a little bit off, texturally. These were dead-on and I can’t help but think it was weighing the flour that was the key. It just solidified for me that measuring ingredients by weight is the way.
- I ran out of vanilla. How is this a good thing, you ask? Because I substituted it with my favorite warm, tasty alcohol: rum. It added a depth I wasn’t expecting. I love vanilla, but apparently Bacardi Gold does the trick, too. I liked it so much that I’m going to do it every time I make these going forward.
This recipe yield was entirely too large for what I needed at the time, so after I baked up about a dozen or so for people who were over, I froze the rest of the dough. I did it the absolute wrong way, which is something I saw on Instagram: rolled the dough into a log, wrapped it in plastic wrap, put it in a freezer bag, and stuck it in the freezer.
Unforeseen complication of combining my cooking with my lack of foresight: when I wanted to make another batch, I had to thaw out only a small bit of the dough and cut it with my bench scraper in order to get only what I needed. It was a whole production, and completely unnecessary.
How you should actually freeze cookie dough for later use:
When you originally make the batter, scoop out however many cookies you need and pop them in the oven. While they bake, scoop the rest of the batter and form into balls that are correctly sized for cookies. Plop them into a freezer bag and make sure the air is out of the bag before you put it in the freezer. This way, next time you want to make cookies, they’re pre-measured.
Whether you want to be the guest who’s best or the host with the most, you can either thaw them in the fridge for an hour or so before baking, or put them right into the preheated oven. Just add another minute or so to the baking time and keep an eye on them.
The cookies are done when they’re a little browned on the edges. Take them out of the oven, let them sit on the pan for a few minutes. As they cool, they’ll continue cooking and the middle will solidify further. Then, move them to a cooling rack.

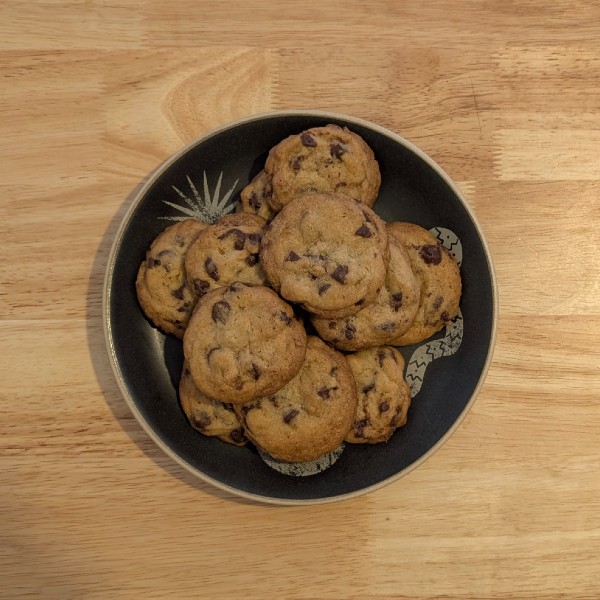
I seriously recommend giving these a shot. No one will ever turn down a chocolate chip cookie, especially one that tastes like this.

Chocolate Chip Cookies
Warm right up with a plate of these classic chocolate chip cookies.
Ingredients
- 300g all-purpose flour (2 1/2 C)
- 3/4 tsp baking soda
- 3/4 tsp Kosher salt
- 1 C (2 full sized sticks) unsalted butter, softened
- 3/4 C light brown sugar
- 1/2 C granulated sugar
- 1 large egg
- 1 TBSP gold or darker rum
- 1 1/2 C semisweet chocolate chips, chunks, or mini-morsels
Instructions
- Preheat the oven to 350°F (skip this step if you plan on chilling your cookie dough – just do it when you take it out of the fridge).
- Line baking sheets with parchment paper.
- In a medium bowl, whisk together the flour, baking soda, and salt.
- Using a stand mixer or hand mixer on medium-low speed, combine the butter and sugars until very light and fluffy.
- While the mixer is still going, add in the egg and rum.
- Change mixer to low speed and slowly add in the flour mixture. I did this about 1 cup at a time.
- Once combined, stir in the chocolate chips. If desired, put the dough in the fridge to chill for 1 hour.
- Using a cookie scoop, ice cream scoop, or measuring spoon, measure a heaping tablespoon of dough, roll into balls, and place on the baking sheets.
- Bake for 12 – 14 minutes or until the edges are golden brown.
- Let the cookies cool on the pan for about 5 minutes, then move to a wire rack to cool completely.
Notes
- The chill time is totally optional. Many bakers recommend freezing their dough, but they were amazing without freezing the first time I made them… at 9PM, half awake while Rob and friends played board games in the other room.
- WEIGH THE FLOUR.
Leave a Reply