Boy oh boy. Did you think I forgot about my pledge to make recipes from my uncle’s Christmas Cookie Bible?
Absolutely not.
I didn’t have as much free time as I did last year so I wasn’t able to bake many varieties. It’s mildly upsetting to think that John would have had hundreds of cookies ready to go by the end of the second week of December, but I used my PTO this year entirely on things I did for myself, which is how you know that I am not like him at all even though it would definitely be a good idea for me to try to be. At least a little.
I did, however, make sure to pick an absolute banger. I checked the reference material (his lists of cookies he made every year dating back to 2007) and found that, even though there were two eggnog cookie recipes in the Cookie Bible, he only ever made one per year, alternating between these and eggnog logs. The latter had a gross name, the frosting had almost exactly the same ingredient list as the cookie itself, and I’d never made thumbprints before, so I went with those.
No regrets.
It’s a collection of simple ingredients you might even have on hand: the standard cookie components, with rum and walnuts being the two things folks might not have in their kitchen. Not needing to go to a grocery store certainly cemented their place in this year’s Uncle John Christmas Cookie Pantheon. Life is already hard enough without having to go shoulder-to-shoulder with total strangers in a New York City supermarket.
These have a warm and festive flavor with a little crunch added by the walnuts. Since John’s commitment to a one-page recipe was admirable but not very practical, I rewrote it for you here in a way that won’t drive you absolutely insane while you make it.
Thumbprint Cookie Tips
I made this recipe twice, like the Super Master Chef Recipe Developer that I obviously am. What I mean to say, of course, is that I made these for my coworkers then realized I needed to bring something to a party and decided to re-make them with some improvements I had in mind. Here are my takeaways:
- Thumbprint Cookie Frosting Ingredients: The first time I made these I used white rum, which is not aged at all. The flavor was…fine, but much sharper than I would have liked. I definitely recommend using amber or dark rum for the frosting here so you get the added vanilla and spiced flavors that rum gets from aging in a wooden barrel.
- Indenting Thumbprint Cookies: The recipe indicates to press down on the cookies to make an indent (hence the term ‘thumbprint’). That being said, I don’t know if I have disproportionate hands or what, but if you roll the cookies into 1″ balls, your thumb won’t make a well in the cookies, it will squish them entirely. Instead, use a 1/2 tsp measuring spoon, place it directly over the ball right in the center, and press down to make a well.


- Filling the cookies: The original recipe says to spoon the frosting into the indentations. Don’t do this, because then the cookies end up looking weirdly similar to crab cakes. If you have a piping bag and tips, great. If you don’t, use a Ziploc bag and snip the corner off- be sure to watch this video for more creative tips on piping without the ~proper equipment.~ I used a Ziploc bag and some disposable Betty Crocker tips I found in a plastic bag in our junk drawer. YOLO.
I know it’s a bit last minute, but there’s still plenty of time to whip up a batch of these and bring joy to everyone you know who loves eggnog (or doesn’t – I had a few “I don’t normally like eggnog but these are really good!” comments from these). Happy holidays… make ’em tasty.

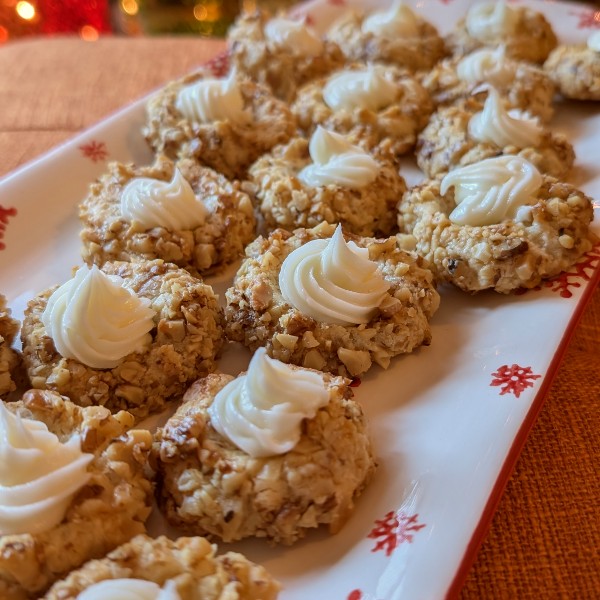
Eggnog Thumbprint Cookies
A festive, fun and crunchy cookie that hits all those rich and warm egg-noggy notes.
Ingredients
Cookie Batter
- 2/3 C butter (see note), softened
- 1/2 C sugar
- 2 eggs, separated into yolks and whites
- 1 tsp vanilla
- 1 1/2 C flour
- 1 1/2 C walnuts, chopped (see note)
Frosting Filling
- 1/4 C butter (1/2 stick), softened
- 1 C powdered sugar
- 1 tsp amber or dark rum
- 1-2 tsp milk
- A ziploc bag or piping bag
- Piping tips (I used ones that are basically disposable since I never need them.)
- Nutmeg, for garnish
Instructions
- Preheat the oven to 375 degrees F.
- Beat butter on medium high for about 30 seconds until it’s fluffy.
- Add granulated sugar and nutmeg and beat until combined.
- Add the egg yolks and vanilla and beat until combined.
- Slowly add the flour. If you’re using a hand mixer, add as much flour as you can; once your mixer quits, use a wooden spoon to mix in the rest.
- The dough might be a little soft and sticky – if so, pop the whole bowl in the fridge while you set up the next step:
- Slightly beat the egg whites so there’s a little bit of air in them. Put them in a shallow bowl or ramekin.
- Next to the bowl of egg whites, place some of the chopped walnuts into a bowl.
- Get out a cookie sheet and line with parchment paper or silicone mat, placing it next to the walnuts.
- Get the dough out of the fridge. Moving like an assembly line, shape the dough into individual 1″ balls, roll it in the egg whites, then roll it in the walnuts so you have a coating of walnuts all around the dough ball. Place 1″ apart on the prepared cookie sheet.
- Using the back of a 1/2 tsp measuring spoon, press down on the dough ball to make a well in the middle of each cookie.
- Bake for 12-15 minutes, or until the edges are lightly browned.
- Cool the cookies on wire racks.
While the cookies cool, make the filling:
- Beat the butter until it’s spreadable.
- Add powdered sugar and beat until a bit crumby.
- Add in the rum and continue mixing to get it to a spreadable/pipe-able consistency. If it’s still not getting there, add milk 1 teaspoon at a time until it’s what you need. If you make it too runny, simply add more powdered sugar.
- Once the cookies are completely cooled, pipe frosting into the wells until you’re happy with them. There should be more than enough frosting to fill the cookies
- Sprinkle with nutmeg. Eat several to make sure they’re good. (They are. You did great!)
Notes
-BUTTER: 2/3 C butter doesn't break out evenly into any other measurement. All told, this recipe (including the frosting) uses just about 2 sticks. I think I had a few tablespoons of butter left after all was said and done.
-WALNUTS: The original recipe, as written, indicated for “finely chopped” walnuts. Since I don't have a food processor, I chopped them until they were a mix of powdery and small chunks. When I served them, multiple people commented actually liking the texture/crunch of having a couple of bigger pieces in there, but you can food process them until they're fine if you want.
Leave a Reply